
Your PC powers on but won’t POST, or it boots but performs far below expectations. Before you start swapping components, check your power supply cables first. Cable-related issues are among the most frequently overlooked causes of new build failures, and PCPartPicker’s compatibility checker doesn’t verify whether you have the right cables or that they’re properly connected.
The quickest diagnostic: if your GPU fans spin but you get no display output, or if your system randomly shuts down under load, you’re likely dealing with insufficient or incorrect PCIe power connections. Many builders assume all PSU cables are interchangeable or that a single 8-pin connector can handle high-end graphics cards that actually require two or three separate cables from the power supply.
PCPartPicker excels at flagging physical incompatibilities like motherboard socket mismatches or oversized coolers, but it can’t detect whether your modular PSU came with enough PCIe cables, if you’re using the right gauge for your power draw, or whether you’ve accidentally mixed cables from different PSU manufacturers. These cable gaps create a blind spot between theoretical compatibility and real-world functionality.
This guide walks through the most common cable-related failures that pass PCPartPicker’s checks, starting with GPU power issues and extending to SATA power limits, motherboard connector oversights, and front-panel wiring mistakes. You’ll learn systematic diagnostics to identify which cable is causing your problem, step-by-step fixes for each scenario, and prevention strategies to avoid these issues in future builds. If you smell burning plastic or see visible damage to any component, power down immediately and consult a professional before proceeding.
Common Cable-Related Boot and Performance Symptoms
Your build powers on, but something’s not right. The fans spin, LEDs glow, but the screen stays black. Or perhaps the system boots one day and refuses the next. These frustrating scenarios often point to cable issues that PCPartPicker’s component compatibility checks can’t catch.
Cable problems create distinct patterns that help narrow your troubleshooting. The most telling symptom is a no-POST scenario where the motherboard receives power but never initiates the boot sequence. You’ll see case fans spinning and motherboard LEDs lit, yet no display output and no diagnostic beeps. This typically indicates a power delivery failure to critical components.
Intermittent boot behavior suggests loose connections or marginal power delivery. The system might boot successfully after multiple attempts, or work reliably for hours before suddenly failing. These inconsistent symptoms often stem from cables that make partial contact or carry insufficient current under load.
Performance degradation rather than complete failure points to bandwidth-limited cables. Your new GPU might post benchmark scores well below expectations, or your SSD transfers files at a fraction of its rated speed. The hardware works, but the cables create bottlenecks that PCPartPicker’s compatibility logic never considers.
- No POST despite power: motherboard lights up but never begins boot sequence, usually power cable issue
- Peripheral detection failures: USB devices, drives, or audio not recognized in BIOS or OS
- GPU underperformance: graphics card runs but delivers lower frame rates or benchmark scores than expected
- Random system crashes: unexplained freezes or reboots under load when temperatures are normal
- RGB and fan malfunctions: lighting effects fail to sync or fans run at fixed speeds despite proper software
- Display signal dropout: monitor loses connection intermittently or fails to achieve rated refresh rate
Pay attention to when symptoms appear. Issues occurring immediately after assembly suggest wrong cables or improper connections. Problems emerging after the system has run successfully for hours or days often indicate thermal expansion affecting marginal connections, or cables degrading under electrical stress.
The pattern of failure matters as much as the failure itself. A GPU that never works points to power cable misconfiguration. A GPU that crashes only during gaming suggests inadequate wire gauge for peak loads. Learning to read these symptoms saves hours of misguided troubleshooting.
Why PCPartPicker Can’t Catch Cable Problems
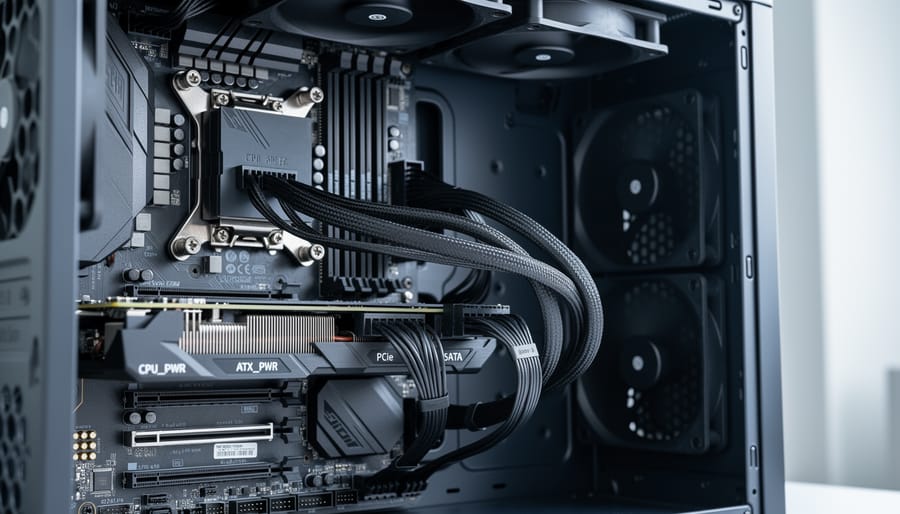
PCPartPicker’s compatibility checker operates on a straightforward principle: it matches component specifications against known standards. The tool verifies socket types, form factors, clearance dimensions, and power draw calculations. It confirms your AM5 CPU fits an AM5 motherboard, your PSU supplies enough wattage for your GPU, and your RAM matches the motherboard’s supported speeds. This logical compatibility checking works brilliantly for preventing obvious mismatches.
The limitation becomes clear when you consider what the database cannot measure. Cable specifications exist in a gray zone between component standards and real-world electrical properties. A modular PSU’s 8-pin PCIe power connector follows a standard pinout, but PCPartPicker has no way to verify whether your specific cable uses 16 AWG or 18 AWG wire. Both fit the socket. Only one reliably delivers 300 watts to a high-end GPU without voltage drop.
Signal cables present similar blind spots. The tool confirms your motherboard has a USB 3.0 header and your case has USB 3.0 front ports. It cannot evaluate whether the included header cable meets USB 3.0 signaling requirements or if it’s a bundled cable that barely passes USB 2.0 speeds. DisplayPort cables illustrate the problem clearly: a DP 1.2 cable and DP 1.4 cable use identical physical connectors, yet only one supports your 4K 144Hz monitor’s full capability.
Length compounds these issues. PCPartPicker doesn’t track cable runs. A 3-foot SATA cable might work flawlessly while a 6-foot version of the same cable fails intermittent writes because inadequate shielding allows electromagnetic interference. Pin configuration variations add another layer, some RGB headers use 12V, others 5V. The database knows your motherboard has RGB headers but cannot warn you the included cable expects a different voltage.
This gap between component compatibility and system functionality explains why builds with perfect PCPartPicker green checkmarks still fail to boot.
The Most Common Cable Culprits in New Builds
PSU and Power Delivery Cables
Modular PSU cables create the most critical compatibility trap because they look identical across brands but use different pinouts internally. A cable from your old Corsair PSU will physically fit your new EVGA unit, but it can send 12V where 5V should go, instantly frying components. Always use only the cables supplied with your specific PSU model, even within the same brand’s product line.
High-wattage GPUs demand thick cables to carry current without voltage drop. Many budget PSUs include 18AWG cables when 16AWG is needed for cards drawing 300W or more. The symptom appears as GPU throttling or system shutdowns under gaming load despite PCPartPicker confirming your PSU’s rated capacity. Check your PSU’s cable gauge specifications against your GPU’s power requirements before assuming your wattage calculation was sufficient.
The 6+2 pin PCIe power connector and 4+4 pin EPS12V CPU connector look nearly identical, and swapping them represents the single most common cable mistake in new builds. PCIe connectors deliver power to the GPU through one circuit; EPS connectors power the CPU through a different circuit with distinct voltage rails. Both physically fit each socket, but connecting them incorrectly prevents POST entirely or causes immediate shutdown. Always verify connector labels printed on both the cable and the component socket.
Data and Signal Cables
Data and signal cables create bottlenecks that feel mysterious because your build powers on fine, components just underperform. SATA cables illustrate the problem perfectly: all SATA connectors look identical, but SATA II cables max out at 3 Gbps while your NVMe-to-SATA adapter or newer SSD needs SATA III’s 6 Gbps. Your drive works, just at half speed.
Display cables cause similar hidden limits. A standard HDMI 1.4 cable physically connects your RTX 4070 to your 144Hz monitor, but you’ll get 60Hz at 1080p, the cable lacks bandwidth for higher refresh rates. DisplayPort versions create the same trap: DP 1.2 won’t push 4K at 144Hz even though both ends have the port. Check HDMI cable reviews or verify you’re using Mini DisplayPort cables rated for your monitor’s specifications, not just whatever shipped with older hardware.
USB headers trip up front-panel connections constantly. That USB-C front port on your new case needs a USB 3.2 Gen 2 header, but your motherboard only has Gen 1. The port goes dead or operates at USB 2.0 speeds, and PCPartPicker never flags the mismatch.
Internal Connector Cables
Internal connector problems often fly under the radar because the PC technically boots, systems power on but behave erratically. Front panel connectors present the first hurdle: power button, reset switch, power LED, and HDD activity light pins follow different layouts across motherboard manufacturers. Consulting your motherboard manual is non-negotiable here; swapping positive and negative leads on LED connectors won’t damage anything, but reversing polarity on the power switch can cause unpredictable behavior.
RGB and ARGB connectors create voltage mismatches that destroy components. Standard RGB runs at 12V with four pins, while addressable RGB operates at 5V with three pins. Plugging a 5V ARGB strip into a 12V header instantly burns out the LEDs. The connectors physically fit either way, so you must verify voltage requirements before connecting any RGB components.
Fan headers introduce compatibility issues through PWM versus DC voltage control. Four-pin PWM fans connect to any header but may run at full speed on three-pin DC headers. Three-pin fans work on PWM headers but sacrifice precise speed control. High-current fans drawing over 1A can overload motherboard headers rated for 1A maximum, this triggers thermal protection shutdowns that mimic other hardware failures. Use powered fan hubs for builds with multiple high-performance fans rather than daisy-chaining splitters off single headers.
Step-by-Step Cable Troubleshooting Process
Power Cable Verification
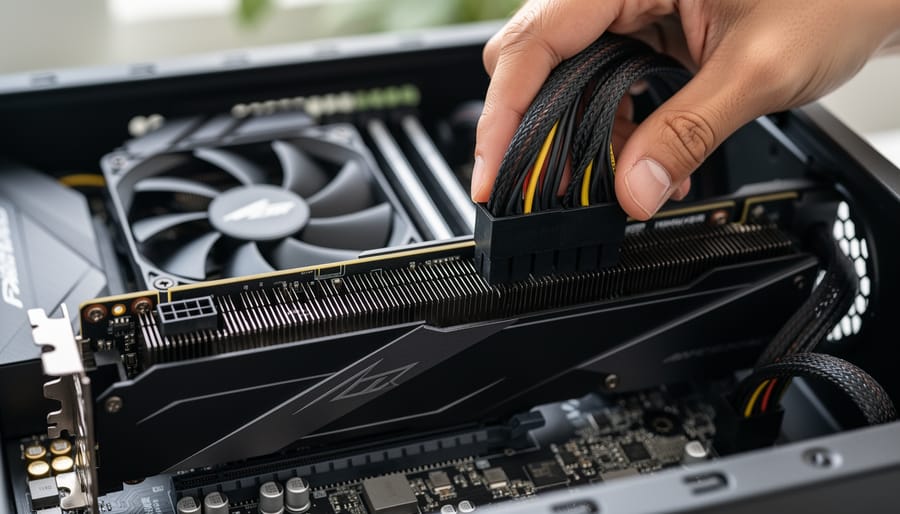
Start by shutting down your system and unplugging the power cable from the wall. Remove the side panel and locate your PSU to access all cable connections. Before touching anything, discharge static by touching a metal part of the case.
Check your PSU’s documentation or the manufacturer’s website to verify which cables came with your specific model. Modular PSU cables aren’t universal, even within the same brand’s product line. Using cables from a different PSU model can send 12V power to 5V or 3.5V pins, destroying components instantly. If you’ve mixed cables or aren’t certain about your cable’s origin, replace it with a confirmed compatible cable from the PSU manufacturer.
Examine each power connector carefully. CPU power uses 4+4 pin or 8-pin connectors labeled “CPU” or “EPS12V” on quality cables. PCIe power for graphics cards uses 6+2 pin or 8-pin connectors marked “PCIe” or “VGA”. These connectors look similar but have different pin configurations. Plugging a PCIe cable into the CPU power header can prevent boot or cause immediate shutdown.
Inspect the wire gauge on your PSU cables. High-power graphics cards drawing 300W or more need 16 or 18 AWG cables. Thinner 20 or 22 AWG cables overheat under sustained load, causing voltage drops that manifest as crashes during gaming or rendering. Quality cables print the gauge on the cable jacket.
For load testing, reconnect everything and run a stress test using combined CPU and GPU benchmarks. Monitor your system with hardware monitoring software, watching for voltage drops on the 12V rail below 11.4V or power-related crashes. Significant voltage sag under load indicates inadequate cabling or PSU issues requiring cable upgrades or PSU replacement.
Data Cable Testing and Replacement
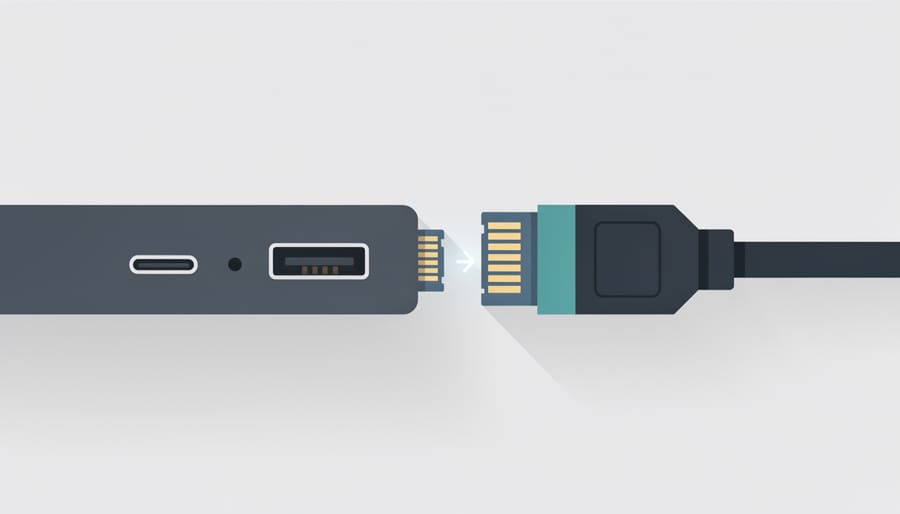
Testing data cables requires a systematic approach that starts with the most likely failure points. Begin with SATA cables connecting storage drives: swap the suspected cable with a known-good cable from a working drive. If the previously undetected drive now appears in BIOS, you’ve found your culprit. Check SATA cable revision ratings, older SATA II cables (3 Gbps) will physically connect to SATA III drives but limit speeds to roughly 300 MB/s instead of the 600 MB/s you’d expect. Run a quick benchmark like CrystalDiskMark before and after cable replacement to confirm transfer speeds match drive specifications.
DisplayPort and HDMI cables cause more subtle issues. If your high-refresh monitor defaults to 60Hz or shows “no signal” intermittently, the cable likely lacks sufficient bandwidth. Check the cable’s certification label: DisplayPort 1.4 cables support 4K at 120Hz, while older 1.2 versions cap at 4K 60Hz. Test with a different cable at your target resolution and refresh rate through display settings. Watch for artifacts, flickering, or blank screens when cycling through refresh options, these indicate signaling problems rather than component incompatibility.
USB data cables fail less often but cause frustrating device detection issues. A USB 2.0 cable on a 3.0 port works for basic peripherals but throttles external SSD speeds dramatically. Swap cables methodically, testing one connection at a time rather than replacing everything simultaneously. This isolation method pinpoints which specific cable causes detection failures or performance drops.
Internal Connector Diagnosis
Start by pulling up your motherboard manual, either the physical booklet or the PDF from the manufacturer’s website. Locate the header pinout diagrams for front panel connectors, RGB headers, and fan connections. These diagrams show exactly which pins carry power, ground, or signal data.
For front panel connectors, verify that power switch, reset switch, power LED, and HDD LED cables match the pinout exactly. A single pin offset prevents boot entirely. If your case came with a consolidated front panel connector, confirm it matches your motherboard’s layout, some boards use proprietary arrangements.
RGB issues require voltage matching. Check whether your motherboard has 12V RGB or 5V ARGB headers, then confirm your devices match. Plugging a 5V ARGB strip into a 12V header destroys the LEDs instantly. The manual specifies header voltage and pin configuration.
Fan headers have three types: 3-pin DC, 4-pin PWM, and high-amperage pump headers. Verify amperage ratings if you’re daisy-chaining multiple fans to one header. Most standard headers supply 1A; exceeding this trips overcurrent protection or causes intermittent failures.
When documentation doesn’t resolve the issue, a multimeter set to continuity mode tests for broken wires or damaged pins. With the system powered off, test ground continuity between connector pins and motherboard mounting screws.
Cable Specifications That PCPartPicker Doesn’t Show
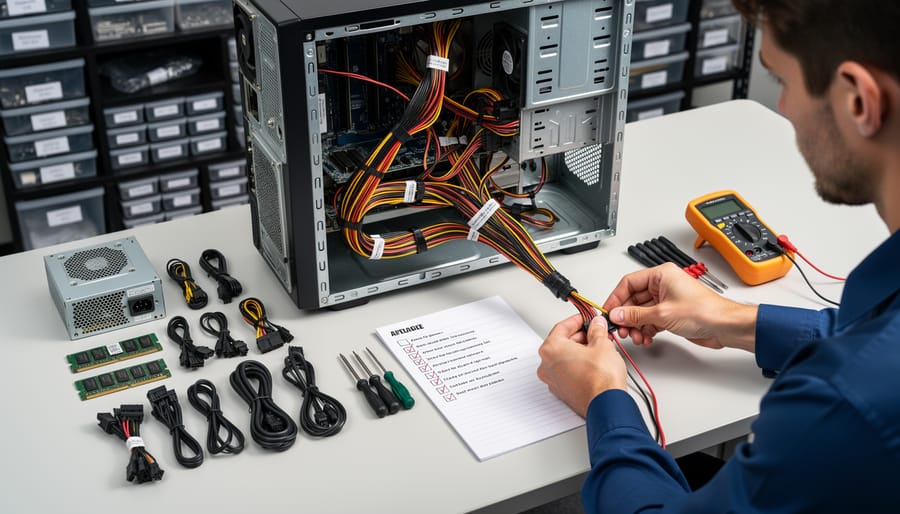
When you’re troubleshooting a build that won’t boot or performs below expectations, the specifications PCPartPicker doesn’t verify become critical diagnostic information. Understanding these technical details helps you identify whether a cable mismatch is causing your problems.
PSU cables use different wire gauges measured in AWG (American Wire Gauge), where lower numbers indicate thicker wires with higher current capacity. Your high-end GPU drawing 300-400 watts needs 16 AWG or 18 AWG cables, not the thinner 22 AWG cables that come with some budget PSUs. Using inadequate gauge cables creates voltage drop under load, causing instability that looks identical to component failures. The cable itself might fit perfectly but can’t deliver the required power safely.
Modular PSU cables aren’t universally compatible even when the physical connectors match. Pin assignments vary between manufacturers, so a Corsair cable plugged into an EVGA PSU can send 12V where ground should be, destroying components instantly. Always verify cable compatibility charts from the PSU manufacturer before mixing cables between units.
| Cable Type | Key Specification | Compatibility Requirement |
|---|---|---|
| SATA Data | Revision 3.0 (6 Gbps) | Required for SSD full speed; older cables limit to 3 Gbps |
| DisplayPort | Version 1.4 or 2.0 | 1.4 needed for 1440p 144Hz; 2.0 for 4K 120Hz+ |
| HDMI | Version 2.0 or 2.1 | 2.0 supports 4K 60Hz; 2.1 required for 4K 120Hz |
| USB 3.x Header | Gen 1 (5 Gbps) vs Gen 2 (10 Gbps) | Case header must match motherboard generation |
These version numbers directly determine whether your components can communicate at their rated speeds. A DisplayPort 1.2 cable connecting a new GPU to a 144Hz monitor will cap you at 85Hz regardless of what both components support. The physical connector looks identical across versions, making this a common trap.
Signal degradation increases with cable length, creating hard limits that aren’t intuitive. DisplayPort maintains reliable 4K signals up to about 6 feet, but beyond 10 feet you’ll see artifacts or signal dropout. USB 3.0 data cables shouldn’t exceed 9 feet without active repeaters, while USB 2.0 tolerates up to 16 feet. SATA cables longer than 3 feet introduce timing issues on high-speed SSDs.
PCIe power cables present a different length problem. Each foot of cable adds resistance, creating voltage drop that compounds under heavy GPU load. A 2-foot cable might deliver 11.8V where a 4-foot cable drops to 11.4V, enough difference to cause crashes during gaming when the GPU spikes to peak power draw.
These specifications require manual verification against your motherboard manual, PSU documentation, and component datasheets. PCPartPicker can’t predict whether your chosen cables will actually deliver the performance your carefully selected components promise.
Preventing Cable Compatibility Issues in Future Builds
Most cable problems stem from assumptions rather than verification. Before ordering parts, download your PSU’s manual and check its cable compatibility chart, even cables that physically fit may use different pin-outs between manufacturers. Cross-reference your GPU’s power requirements against your PSU’s PCIe cable specifications, paying attention to whether your card needs separate cables or if daisy-chained connectors will suffice.
Create a spreadsheet listing every cable your build requires with three columns: component requirement, cable specification, and verification status. For your GPU, note the exact PCIe power configuration. For storage, record whether your motherboard supports SATA III speeds and your drives’ interface versions. For displays, confirm your monitor’s refresh rate and resolution match your cable’s bandwidth capability. This simple documentation catches mismatches before you’ve torn open packaging.
Choose cables with proper certifications rather than generic options. Look for USB-IF certification on USB cables, VESA certification on DisplayPort cables, and UL or TUV marks on power cables. These certifications confirm the cable meets the standard’s electrical and signal integrity requirements. Yes, certified cables cost more than generic alternatives, but the price difference is negligible compared to debugging random failures or replacing damaged components.
Cable management affects more than aesthetics, it influences signal integrity. Keep power and data cables separated where possible, especially high-speed USB and DisplayPort cables. Avoid tight 90-degree bends in any cable thicker than 18AWG. Leave slack near connectors rather than pulling cables taut, which stresses solder joints and can cause intermittent connections after thermal cycling.
Stock your toolkit with quality spare cables for critical connections: an extra set of PCIe power cables compatible with your PSU, a certified DisplayPort 1.4 cable, and SATA III data cables. If you’re building custom cable extensions or sleeves, learn how to crimp connectors properly and invest in a quality crimping tool and wire stripping tool. Poor crimps cause the exact intermittent connection issues you’re trying to prevent.
Document your final cable configuration with photos before closing your case. Label custom cables with their source PSU model using heat-shrink tubing or cable tags. This documentation becomes invaluable when troubleshooting future issues or upgrading components, eliminating guesswork about which cables belong where.
Frequently Asked Cable Compatibility Questions
Can I use modular PSU cables from different brands or models?
No, modular PSU cables are not interchangeable between brands or even between different models from the same manufacturer. The pin-out configurations vary, and using the wrong cable can deliver voltage to incorrect pins, potentially destroying components instantly.
Do expensive HDMI and DisplayPort cables actually improve performance?
For digital signals, cables either work or they don’t, there’s no middle ground for image quality. Premium cables may offer better build quality and longer lifespan, but a $10 certified cable will deliver identical visual performance to a $100 cable if both meet the required specification for your resolution and refresh rate.
How can I tell if a cable is fake or substandard?
Check for certification markings like USB-IF logos, 80 Plus badges on PSU cables, or HDMI licensing stamps. Genuine cables have consistent labeling, proper shielding thickness, and solid connector housings. If a cable feels unusually lightweight, has misspelled text, or lacks any certification marks, it’s likely counterfeit or below spec.
When does cable quality actually matter versus being marketing hype?
Cable quality matters most for high-power delivery (GPUs drawing 300W+), high-bandwidth applications (4K 144Hz displays), and long cable runs where signal degradation becomes measurable. For basic connections like SATA to an HDD or front panel headers, any properly-specified cable works fine, premium versions offer no real benefit.
Beyond these core concerns, understanding which cable specifications genuinely affect performance helps you spend money where it counts. Power cables need adequate wire gauge for the current they’ll carry. A 16 AWG cable can’t safely deliver what an 18 AWG cable can, and trying to push high wattage through underspecified wiring creates heat buildup and voltage drops that destabilize your system.
Data cables have bandwidth limits tied to their physical construction and the standards they meet. An HDMI 1.4 cable can’t magically carry HDMI 2.1 bandwidth no matter how much you paid for it. The shielding, twist rate of internal pairs, and connector quality determine whether the cable can maintain signal integrity at the required data rate. Once you exceed those limits, you’ll see artifacting, dropped frames, or complete signal loss.
Length restrictions exist for physical reasons, not arbitrary marketing. USB 2.0 works reliably at five meters, but USB 3.0 signal quality degrades significantly past three meters without active repeaters. Similarly, SATA cables over one meter risk data corruption at 6 Gbps speeds. PCIe riser cables introduce latency and potential instability beyond 30 centimeters unless they use active signal boosting.
The practical takeaway: match your cable specs to your component requirements. Don’t overspend on gold-plated connectors for digital signals, but don’t cheap out on power delivery or high-bandwidth applications where physics actually imposes real constraints. Check certification marks, verify specifications match your needs, and test cables in your specific configuration. Most builders find that mid-range cables from reputable manufacturers offer the best balance of reliability and value.
PCPartPicker remains the best tool available for ensuring your components fit together physically and electrically. But as you’ve seen throughout this troubleshooting guide, “fits together” doesn’t guarantee “works properly.” The platform verifies socket types, power requirements, and case clearances brilliantly, yet it can’t assess whether your SATA cable supports SATA III speeds, if your PSU cables match your modular unit, or whether your DisplayPort cable has the bandwidth for your 165Hz monitor.
Treat cables as components, not accessories. A $1,200 GPU throttled by a low-gauge PCIe power cable or a high-end NVMe SSD capped at SATA II speeds because of an old cable represents wasted money and performance. Keep quality cables in your builder’s toolkit: proper-gauge PSU extensions, certified DisplayPort 1.4 cables, and SATA III data cables with secure latches. When troubleshooting builds that won’t POST or perform below expectations, check your cables systematically before assuming component failure.
The time investment pays off. Spending fifteen minutes cross-referencing PSU cable pinouts or verifying USB header generations prevents hours of frustration diagnosing mysterious boot failures. Build with the same care you apply to choosing components, and your PCPartPicker build will actually deliver the performance you planned for.